Staff subgroups, grouping, and filters
Last updated: September 9, 2026
Use staff tags to create staff subgroups, such as regions, languages, or a float pool. A staff member can have more than one tag. Tags organize your views; they do not grant permissions or assign a staff member to a client's care team.
Use Group by to arrange the calendar and Filter to narrow who appears. To review working hours instead, see Team Availability in the Team navigation.
Find the controls
Open Schedule → By Clinician in a calendar view. Staff tags, Group by, and Filter are in the top bar above the calendar, including on smaller screens. The staff picker remains in the sidebar. On a small screen, open the sidebar to change that selection. In Table view, use the table's own filters. These staff controls are not shown in By Clients.
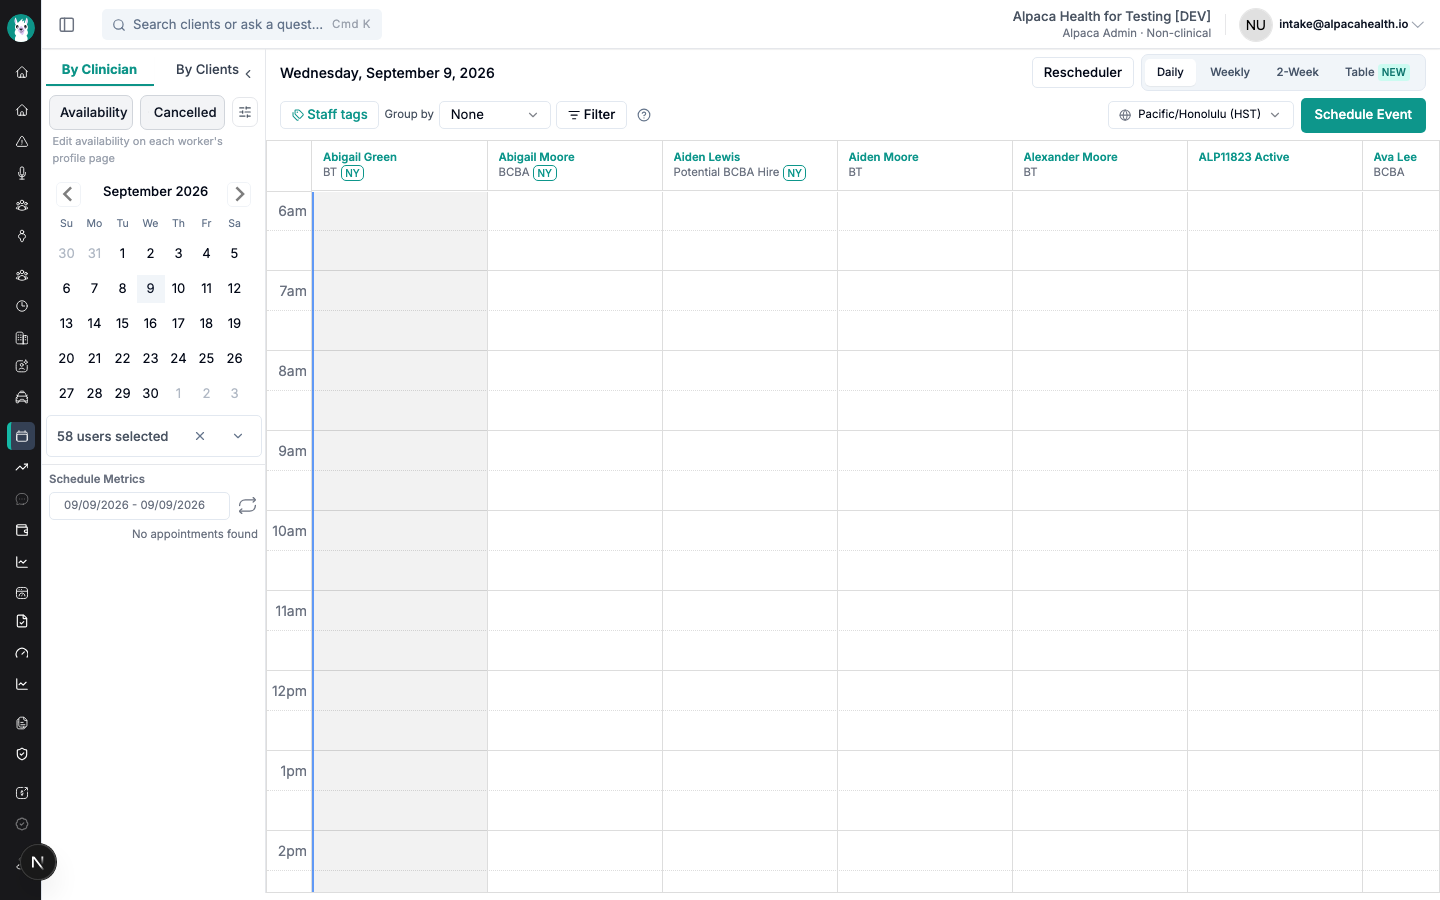
These controls require access to the team schedule. Creating and assigning tags also requires staff-tag management permission. If Staff tags is missing, ask your organization administrator for help; you may still be able to group or filter by tags someone else has assigned.
Create a tag and assign staff
Select Staff tags, then Create tag.
Enter a unique name for the tag and select Save. The staff assignment dialog opens.
Select the staff who belong to the tag. Changes save automatically. Scroll the list to reach more people, or use Search staff.
Select all matching staff affects only the people matching your current search. Clearing a checkbox removes that person from this tag, not from any other tag.
Select Done. You can return using Assign staff beside the tag.
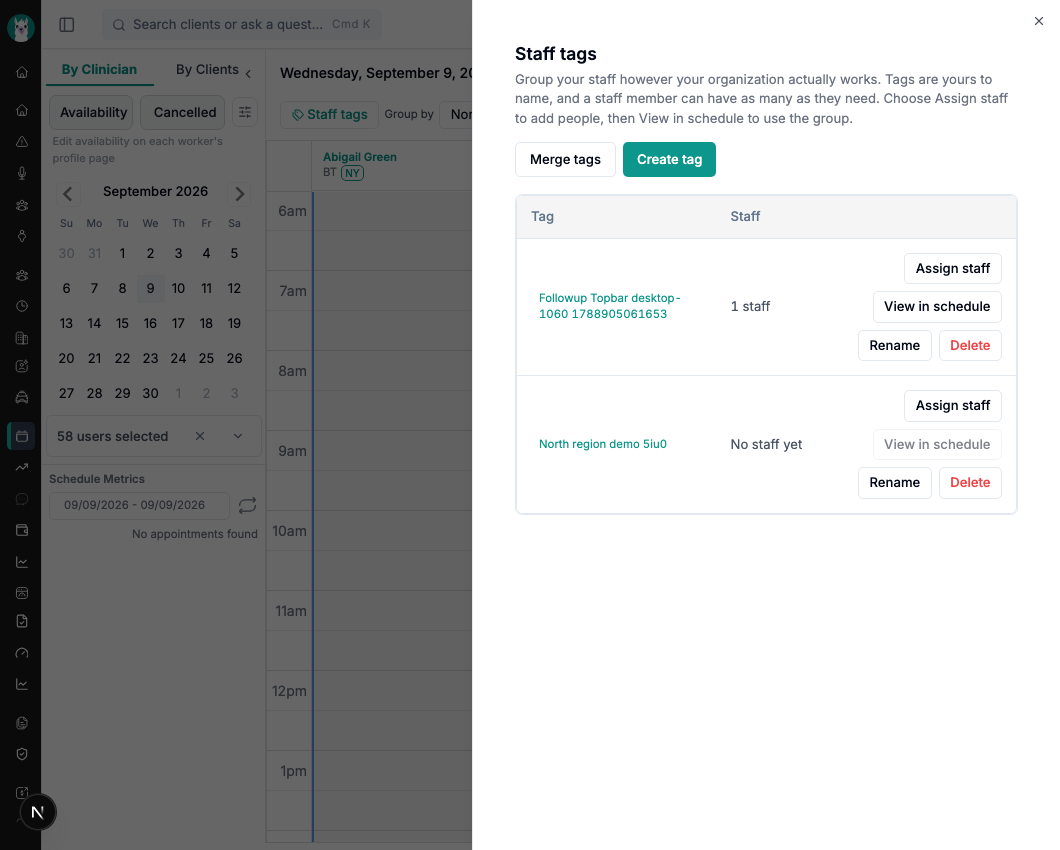
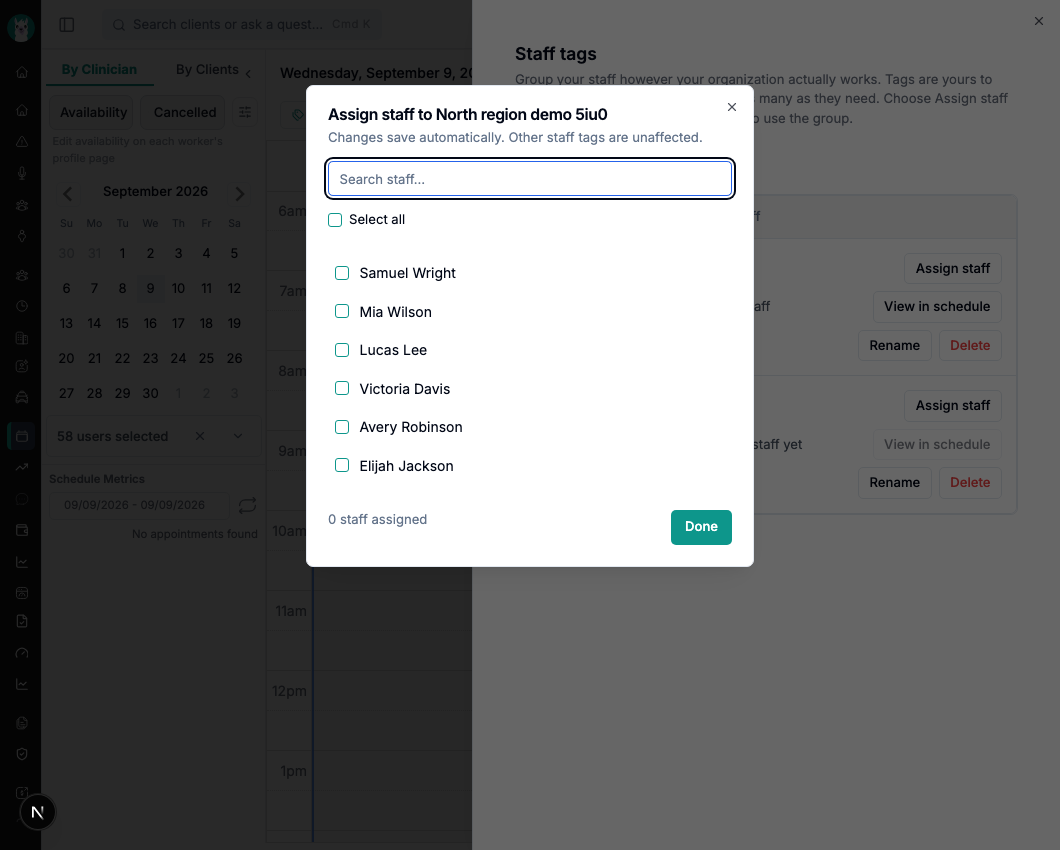
If staff fail to load, select Try again. If an assignment fails, retry the change; reopen the manager after reloading if you are unsure whether a change saved.
Maintain your subgroups
Return to Staff tags to use Assign staff or Rename beside an existing tag. Tag names and assignments are shared within your organization, not personal calendar preferences. You can also select staff in My Team and use Add tag or Remove tag to update the selected people.
Delete removes a tag from its assigned staff without changing their other tags. Merge tags combines two or more tags into one and deletes the source tags. Both actions require confirmation and cannot be undone; review the affected staff count before confirming. Use Cancel if you only wanted to remove a calendar filter.
Group or filter your calendar
Group by organizes the selected staff into bands without hiding them. Choose Tags, Clinical role, or Payroll work state, depending on the information present on your roster. Choose None for an ungrouped view.
Filter narrows the visible staff. Apply your choices and look for the active filter chips below the controls. Remove a chip to clear that filter.
View in schedule beside a tag selects that tag's staff, groups by Tags, and clears conflicting staff filters. A tag needs assigned staff before this action is available. Removing its tag chip restores the view that this jump replaced unless you have deliberately applied filters, chosen a new grouping, or saved a new default.
Apply in Filter keeps exactly the filters you chose. After a tag jump, it returns to your prior staff selection and grouping with those new filters applied; it does not bring back the old filters when you later remove a chip.
Tags appears in Group by only when roster members have tags assigned. Staff with multiple tags appear in a Multiple tags band rather than duplicated calendar columns. These controls do not change appointments, staff members' other tags, or organization-wide defaults. Use Save as default in Filter only when you want to save your own default view.
Apply, reset, or clear filters
Select Filter and check the values you want to include. Multiple choices in one section include any of those values; different sections narrow the result together. For example, a role and a tag show staff who match both.
Select Apply to use those choices. Your staff selection still matters: filters do not automatically select everyone on the roster.
To undo edits before applying, select Reset. To remove all filter constraints, select Clear all, then Apply.
All options checked in a section means that section is unrestricted. A section with available choices cannot be left entirely unchecked; choose at least one, or use Clear all. Closing Filter without applying leaves the current view unchanged.
If the result is not what you expected
No staff appear: check the staff picker and active filter chips. Clear filters and select the staff you want to see.
Tags is missing from Group by: assign staff to a tag first. Creating an empty tag alone does not add a grouping option.
View in schedule is unavailable: the tag needs at least one assigned staff member.
A person appears under Multiple tags: they belong to more than one tag; they are shown once, rather than repeated across calendar columns.
A change did not save: follow the error message, retry, then reload and reopen the tag to confirm its assignments. Do not assume a failed request saved.
Take the interactive tour
The small prompt attached to the highlighted Staff tags button offers Try it. It opens the tag manager directly. Close the manager when ready, choose a Group by option, then select Try filters and Apply. Closing Filter without applying returns you to that step. You do not need to create a tag to explore the controls.
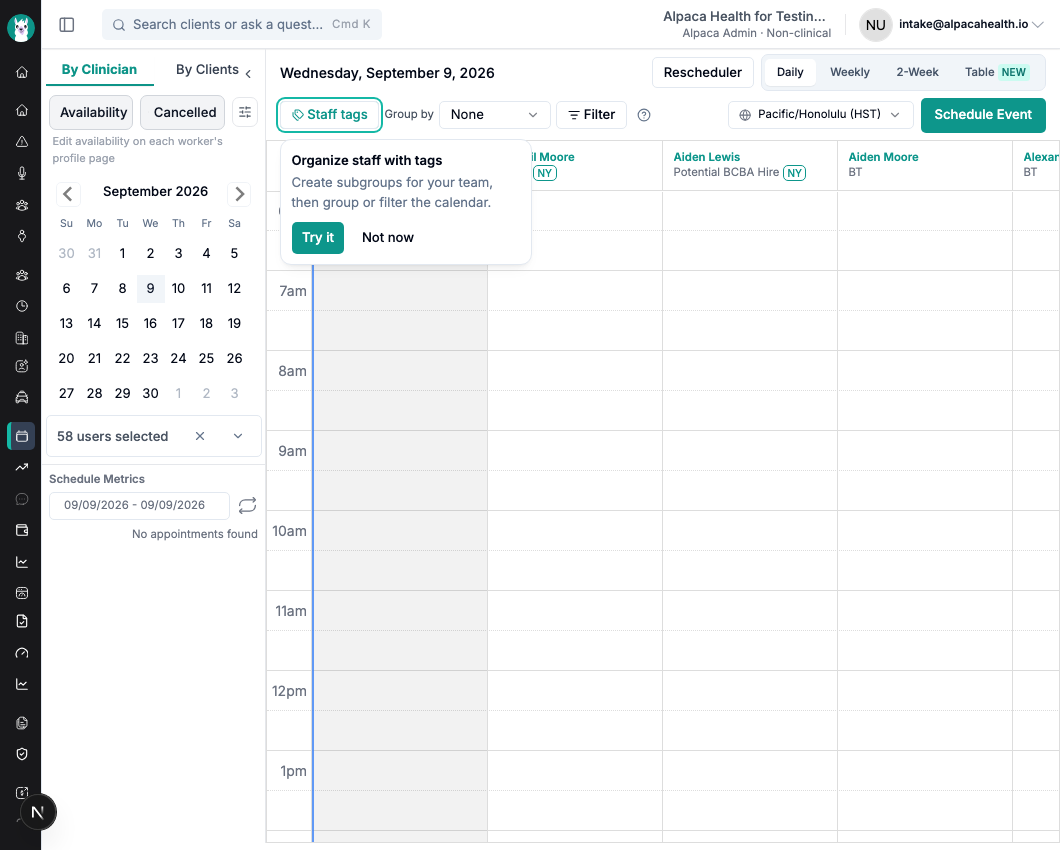
Select Not now to dismiss the initial prompt or Skip tour during the guide. Reopen the guide any time from the question-mark button beside Filter, labeled Staff tags and grouping tour. Users without tag-management permission start at Group by instead.
The prompt is dismissed per person and organization in this browser. It does not change another person's onboarding or require completing the tour to use Schedule.