Missing information tasks
Last updated: August 21, 2026
When you first join Alpaca Health, your care team needs a few documents and details before therapy can move forward. Anything still needed shows up as a missing information task in your parent portal. This guide shows you where those tasks live and how to complete each one.
Where to find your missing information tasks
Your outstanding tasks live on the Overview page — the first screen you see when you sign in to the parent portal. If you are somewhere else in the portal, click Overview at the very top of the menu on the left.
Scroll down past the insurance summary to the Action Required card. The red heading shows how many items are still open, for example “Action Required (7).” Everything listed inside this card is something your care team is waiting on.
The Action Required card on the Overview page lists every outstanding task and shows a count of how many are still open.
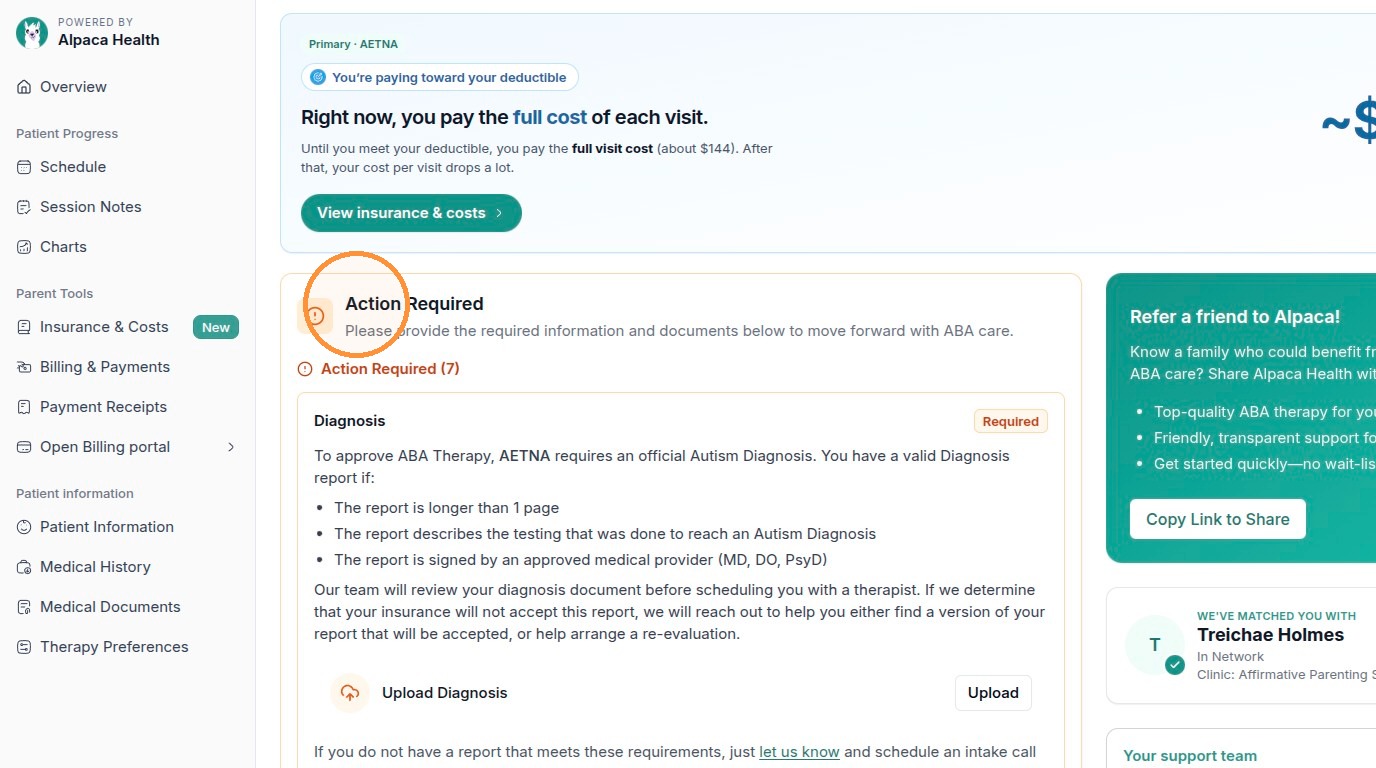
Each task is tied to the child you are currently viewing. If you care for more than one child, use the patient tabs across the top of the page to switch between children and complete the tasks for each one. Intake paperwork has a shortcut that covers every child at once — see “Sign intake paperwork” below.
Upload a required document
Some tasks ask you to upload a file — most often your child’s Diagnosis report and the front and back of your insurance card.
In the Action Required card, find the document you want to provide (for example, “Upload Diagnosis,” “Insurance Card Front,” or “Insurance Card Back”).
Click the Upload button on that row. There is a separate Upload button for each document, so make sure you click the one on the same row as the document you are providing — otherwise the file is filed under the wrong item.
Choose the file from your computer or phone. Once it finishes uploading, the item drops off your Action Required list.
Each document has its own Upload button on the right. Here the Upload button for the Diagnosis report is selected.
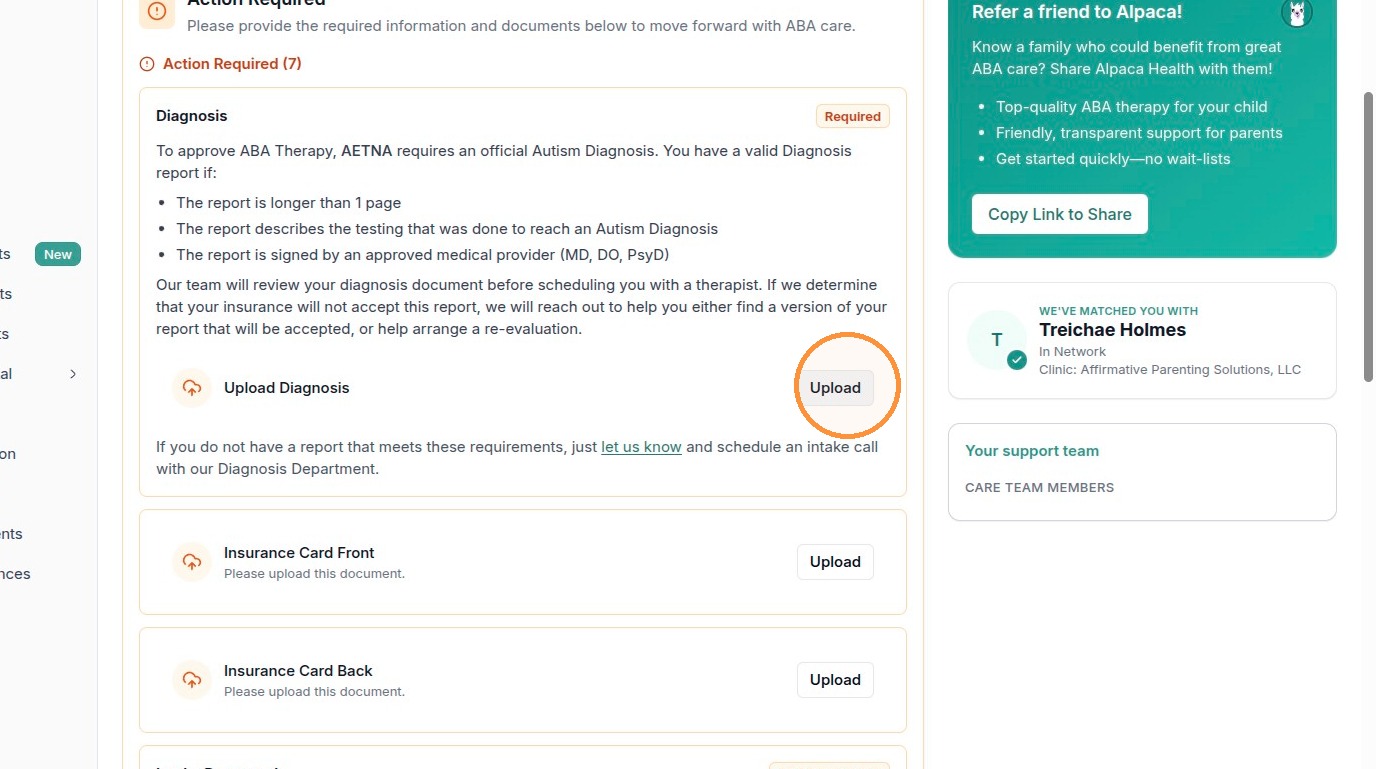
About the Diagnosis report: to be accepted, the report usually needs to be longer than one page, describe the testing used to reach an autism diagnosis, and be signed by an approved medical provider (MD, DO, or PsyD). Your care team reviews it before scheduling. If your report does not meet these requirements, click the “let us know” text in that same section to reach the Diagnosis Department.
Sign intake paperwork
Intake paperwork sits in its own card, just below the document uploads. It usually contains four forms: Consent to Treat, Telehealth Informed Consent, Assignment of Benefits / Financial Responsibility, and Release of Information. A badge such as “4 of 4 remaining” tells you how many are still unsigned.
The Intake Paperwork card. You can open one form at a time, or use the buttons at the bottom to sign in bulk.

Option 1 — Sign one form at a time
Click the name of the form you want to read, for example Consent to Treat.
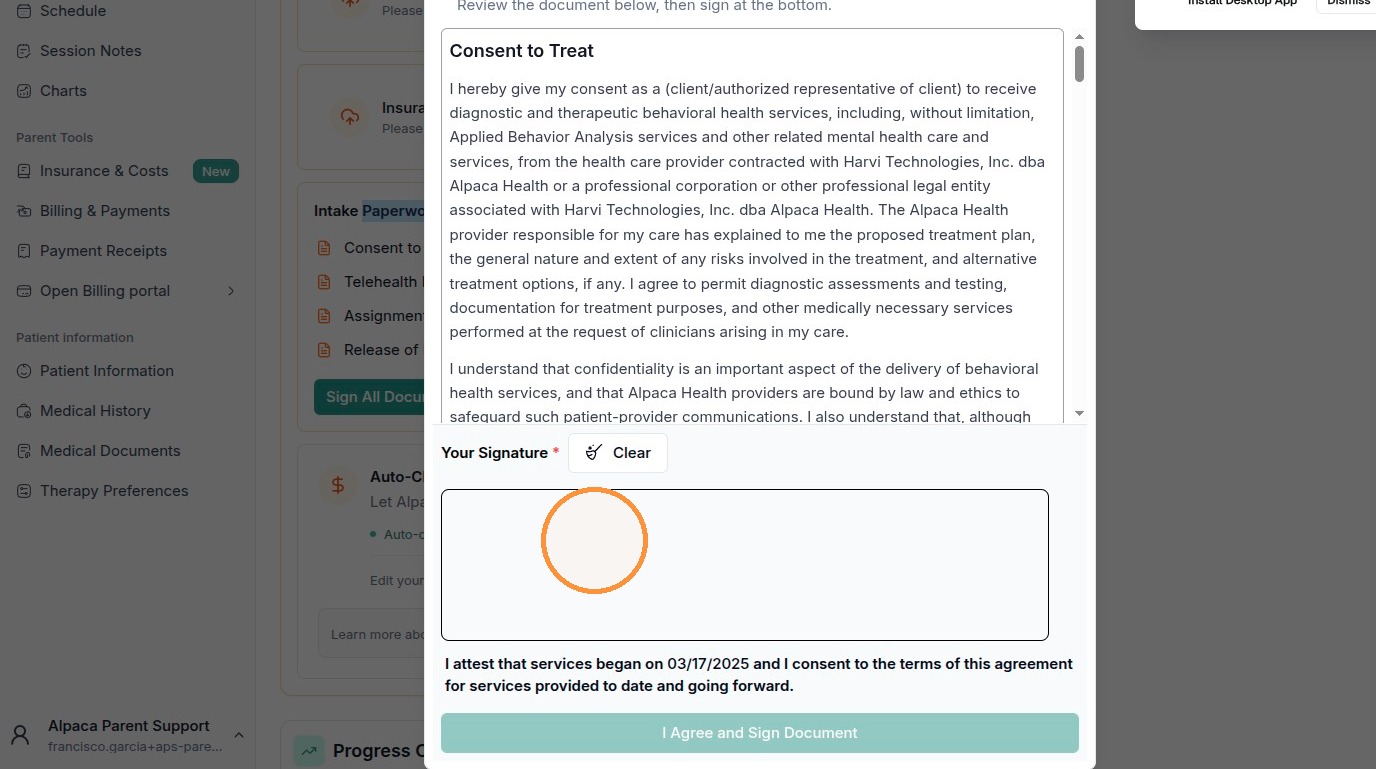
A window opens with the full document. Use the scroll bar on the right to read all the way to the bottom — the signing button stays inactive until you reach the signature area.
In the Your Signature box, draw your signature with your mouse, trackpad, or finger. Made a mistake? Click Clear and try again.
Click I Agree and Sign Document to save it. The form then drops off your remaining list. Repeat for each remaining form.
Draw your signature in the box, then click “I Agree and Sign Document.”
Option 2 — Sign for all children at once
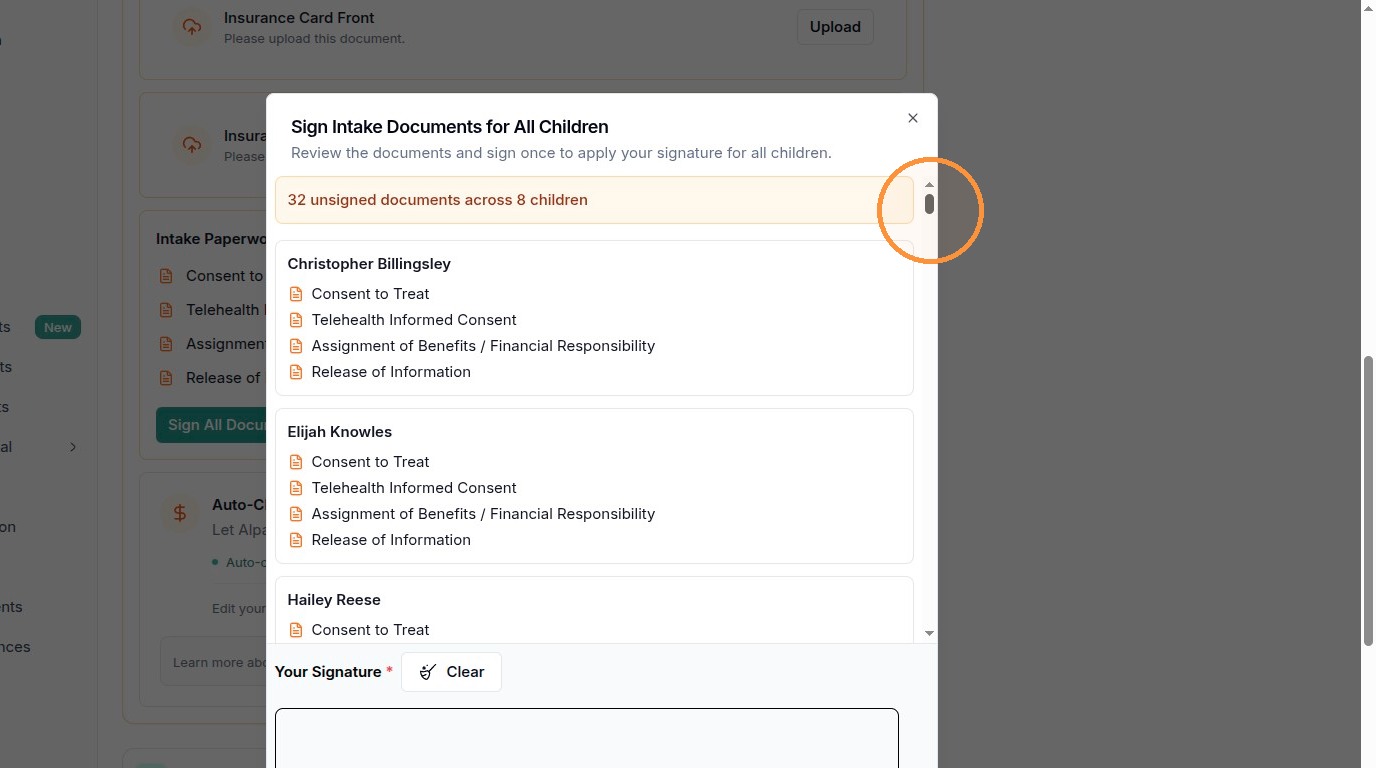
If you care for more than one child, you do not have to sign the same forms over and over. At the bottom of the Intake Paperwork card there are two buttons, and it helps to know the difference: Sign All Documents (the green button) signs every form for the child you are currently viewing, while Sign for All Children (the plain button beside it) applies your signature to every unsigned form across all of your children in one step.
Click “Sign for All Children” — the plain button next to the green “Sign All Documents” button — to cover every child at once.
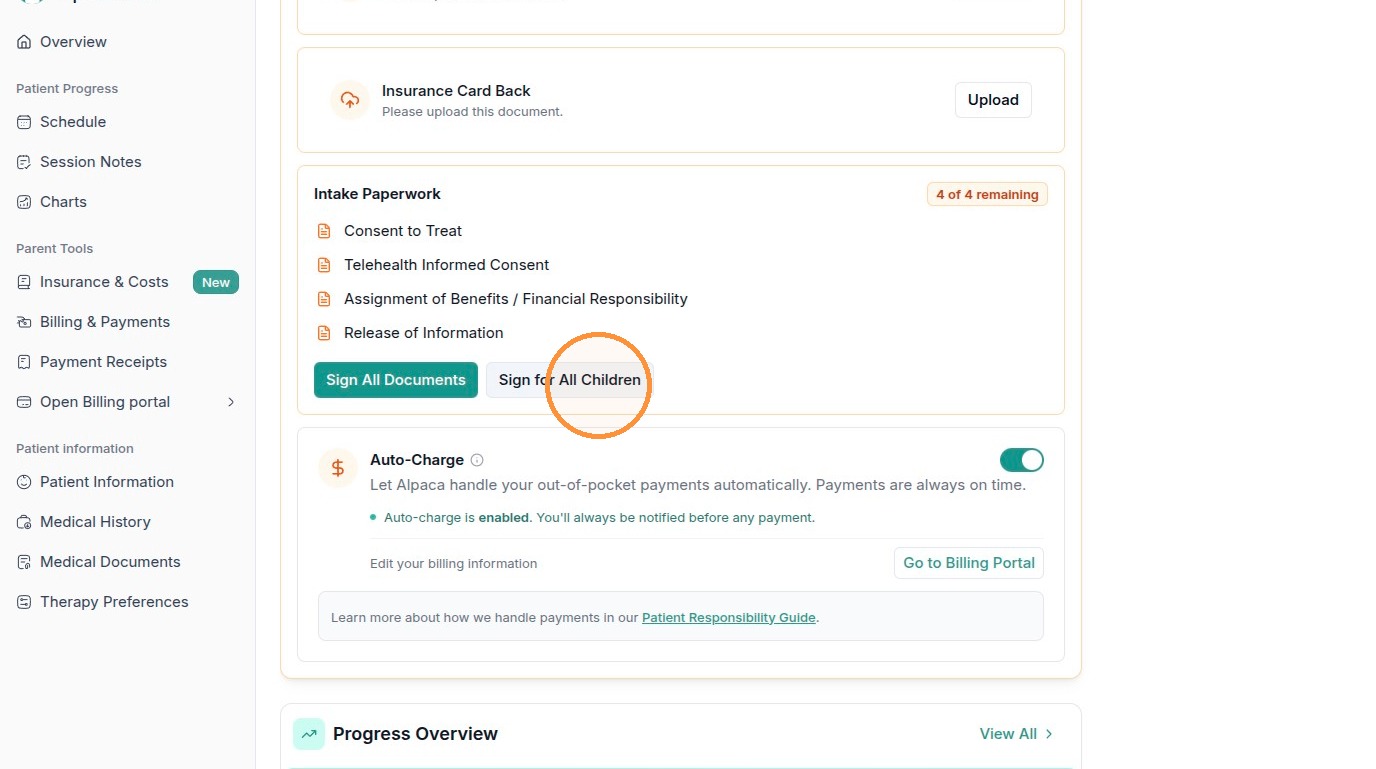
At the bottom of the Intake Paperwork card, click Sign for All Children.
A window titled “Sign Intake Documents for All Children” opens. A banner tells you how much this covers (for example, “32 unsigned documents across 8 children”). Scroll through to review the forms grouped under each child’s name.
Draw your signature once in the Your Signature box at the bottom, then confirm. Your signature is applied to every listed form for every child.
The “Sign Intake Documents for All Children” window. One signature covers every unsigned form for all of your children.
Manage documents from the Medical Documents page
Besides the Action Required card, you can add and review uploads any time from the Medical Documents page. Open it from Medical Documents in the menu on the left, under the “Patient information” heading — it sits between Medical History and Therapy Preferences.
This page has two parts:
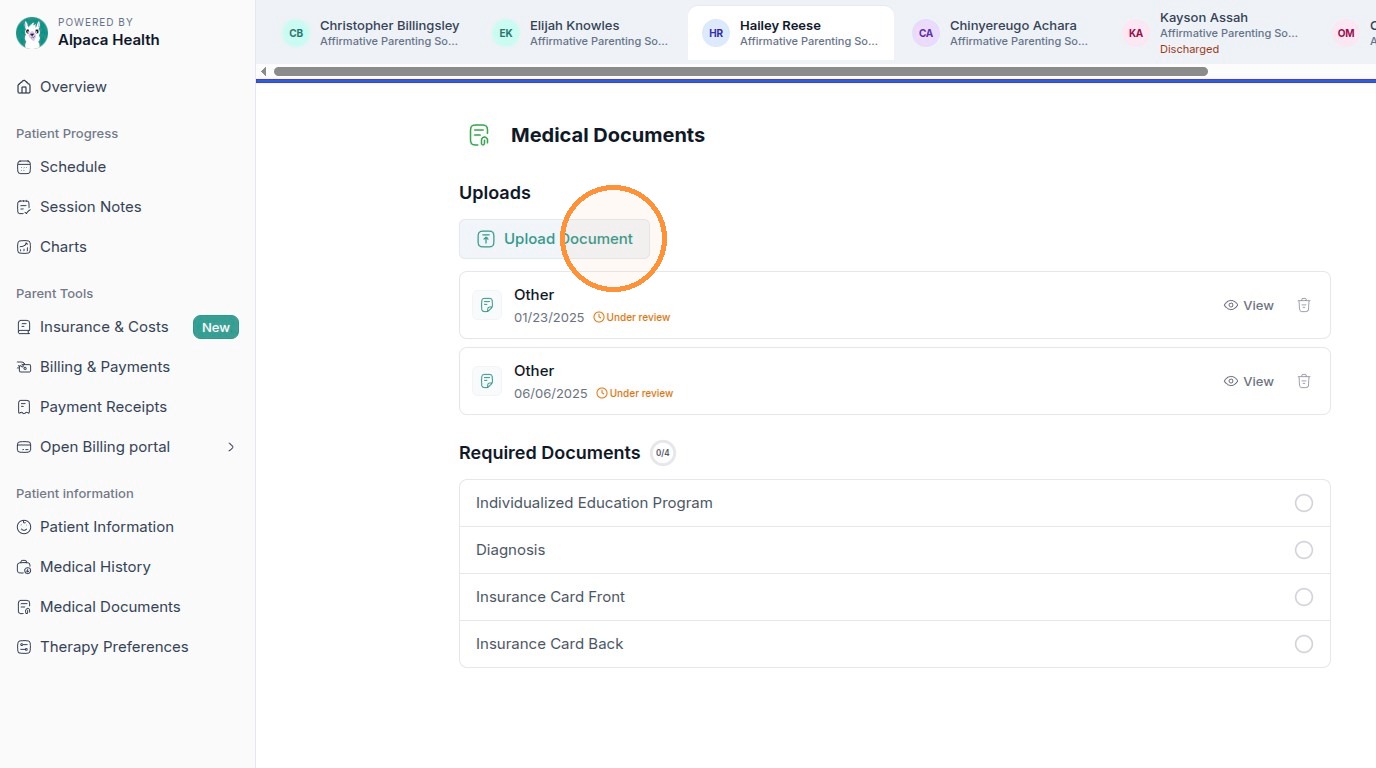
Uploads — everything you have already sent in. Each file shows a status such as “Under review” while your care team checks it. Click View on any file to open and read it, then close the viewer to return.
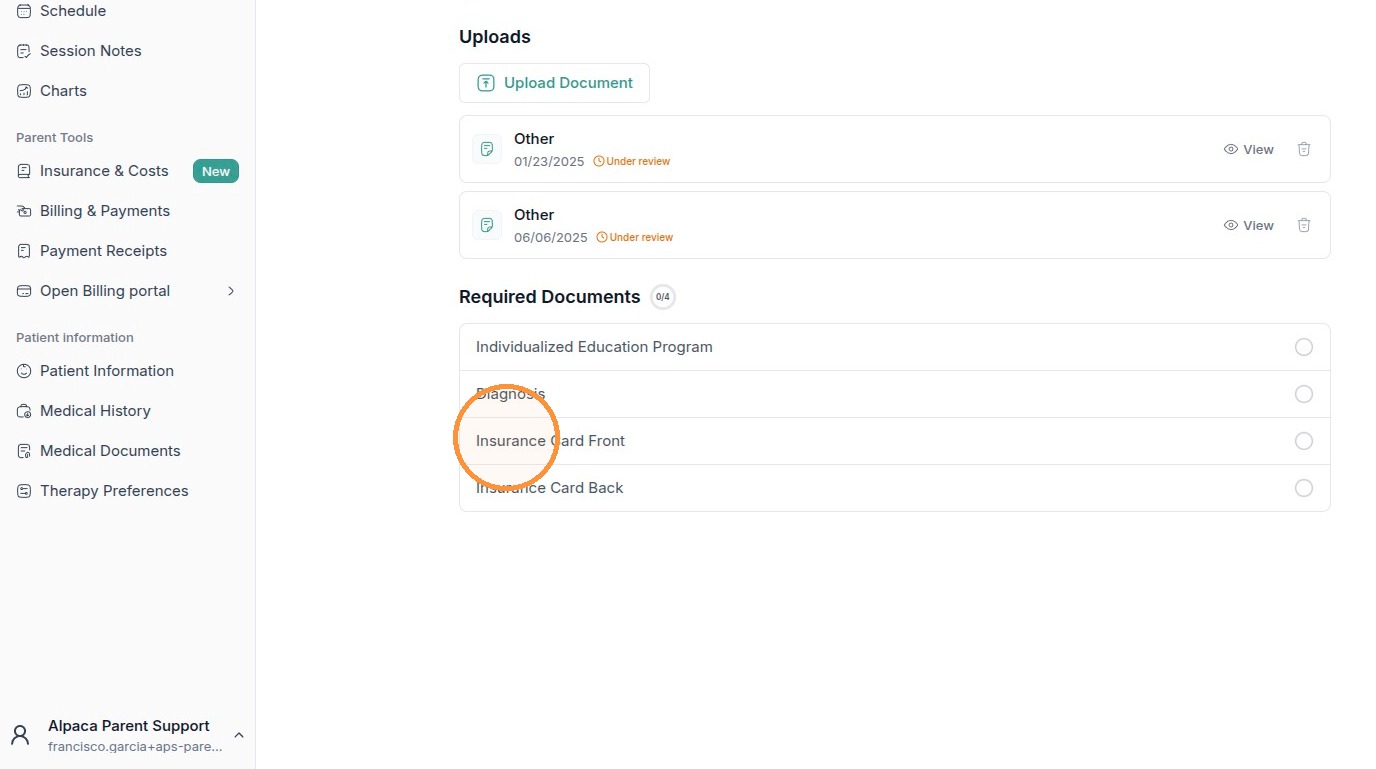
Required Documents — a checklist (for example “0/4”) of the specific files still needed: Individualized Education Program, Diagnosis, Insurance Card Front, and Insurance Card Back.
The Medical Documents page. Uploads you have already sent are at the top; the Required Documents checklist shows what is still needed.
To add a file from this page:
Click the green Upload Document button in the Uploads section.
In the window that opens, click Click to upload or drag and drop, then choose your file. Files can be up to 50 MB.
Click Upload Document(s) to finish. Your care team reviews it and matches it to the right required item.
Click the green Upload Document button to add a new file.
Click inside the dashed box to choose a file, or drag and drop it in.

Add your child’s medical history
Diagnoses and medications are stored on the Medical History page. Open it from Medical History in the menu on the left, under “Patient information” (just above Medical Documents).
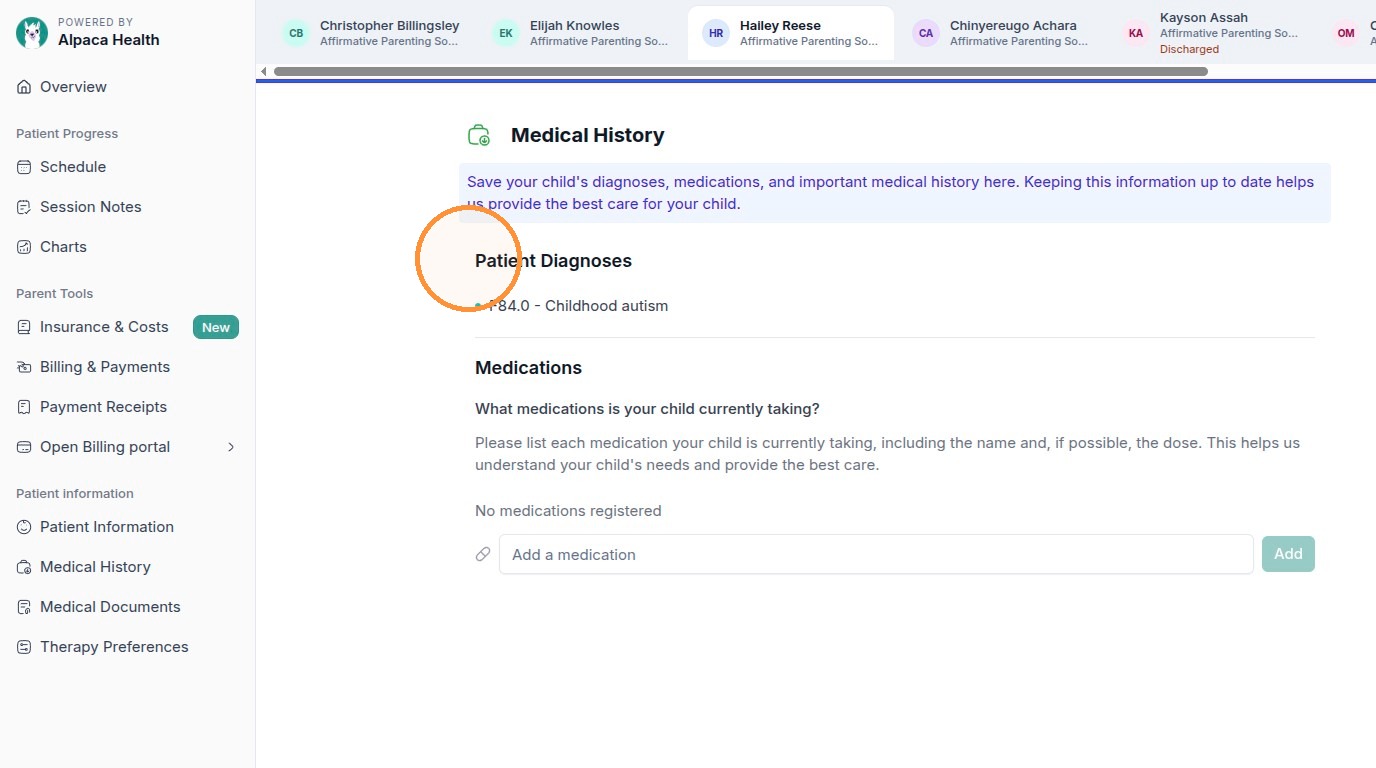
Patient Diagnoses lists the diagnoses already on file (for example, “F84.0 - Childhood autism”).
Medications is where you record what your child currently takes.
The Medical History page holds your child’s diagnoses and current medications.
To add a medication:
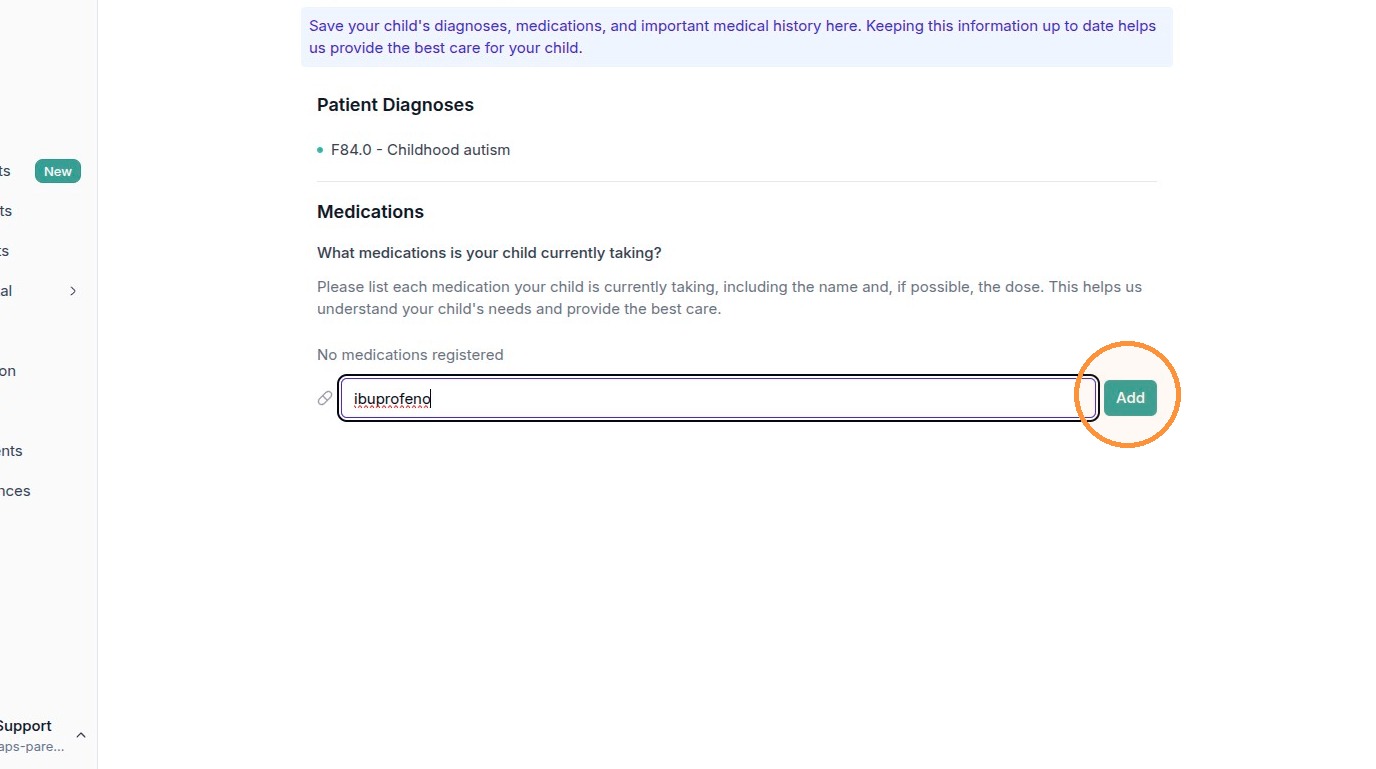
Click the Add a medication field and type the medication’s name — and the dose, if you know it.
Click Add. The Add button stays grey until you have typed something. Add one medication at a time, and repeat for each one.
Type the medication name, then click Add. Add one medication at a time.
Add your child’s service providers
Keeping your child’s doctors and therapists on file helps your whole care team stay connected. This lives on the Patient Information page — open it from Patient Information in the menu on the left (under “Patient information,” at the top of that group), then scroll to the Service Providers section.
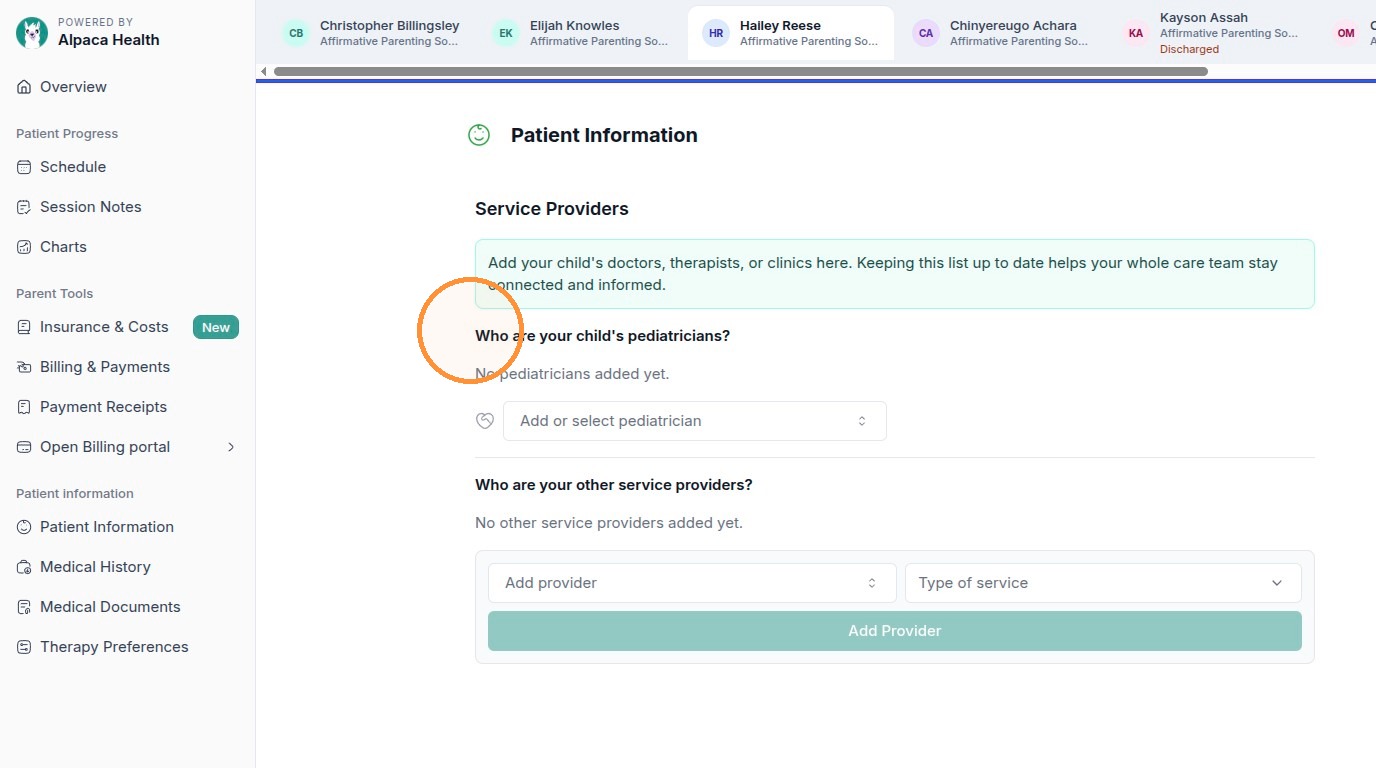
There are two separate lists here, and it is easy to mix them up:
Who are your child’s pediatricians? — use the Add or select pediatrician box here for pediatricians only.
Who are your other service providers? — use the Add provider box here for everyone else, such as therapists, specialists, and clinics.
The Service Providers section has one list for pediatricians and a separate list for all other providers.
Add a pediatrician
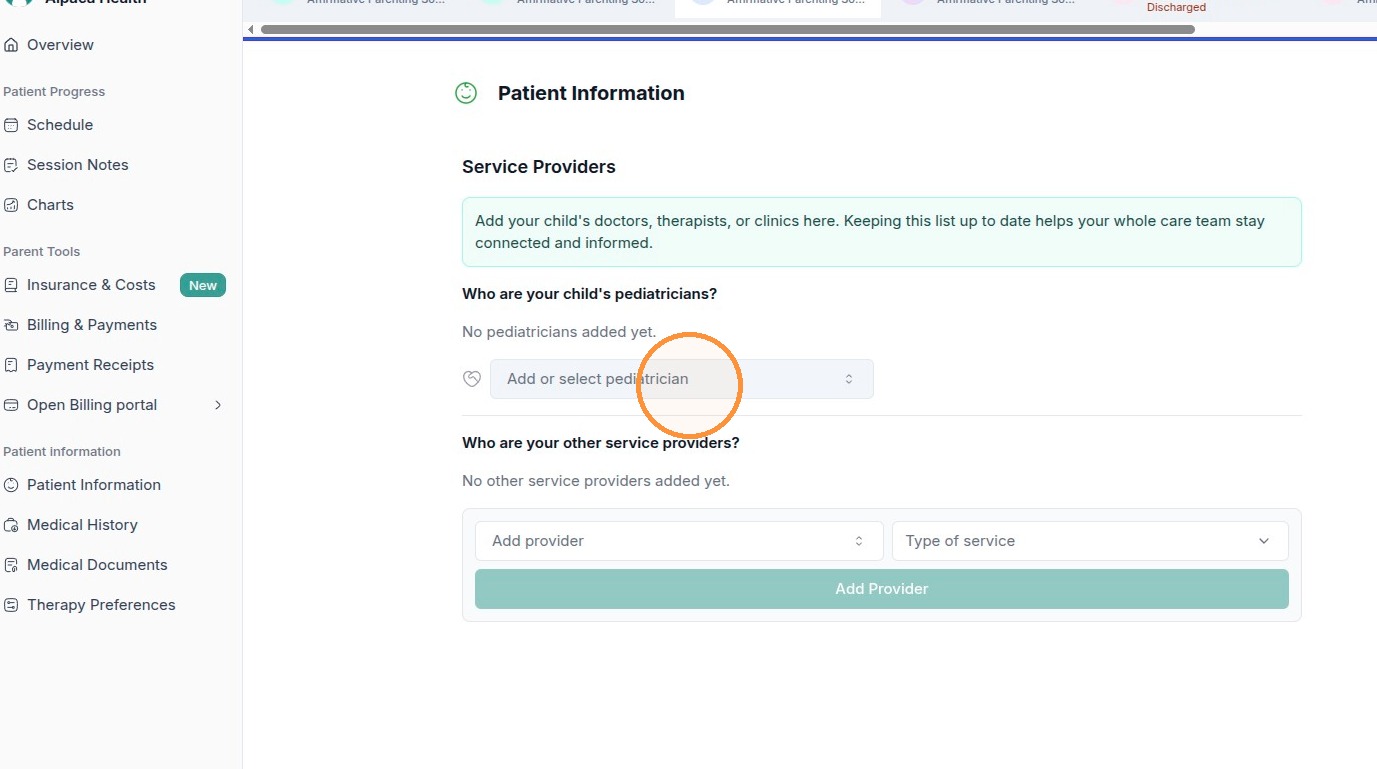
Under “Who are your child’s pediatricians?”, click Add or select pediatrician.
Start typing in the Search box and pick your child’s pediatrician from the list. Cannot find them? Click Add Service Provider at the bottom of the list to enter their details by hand — clinic name, address, phone, and so on — then save.
The pediatrician appears as a card. To remove one later, click the trash icon on its card.
Click “Add or select pediatrician” to search for and add a pediatrician.
Add any other provider (therapist, specialist, clinic)
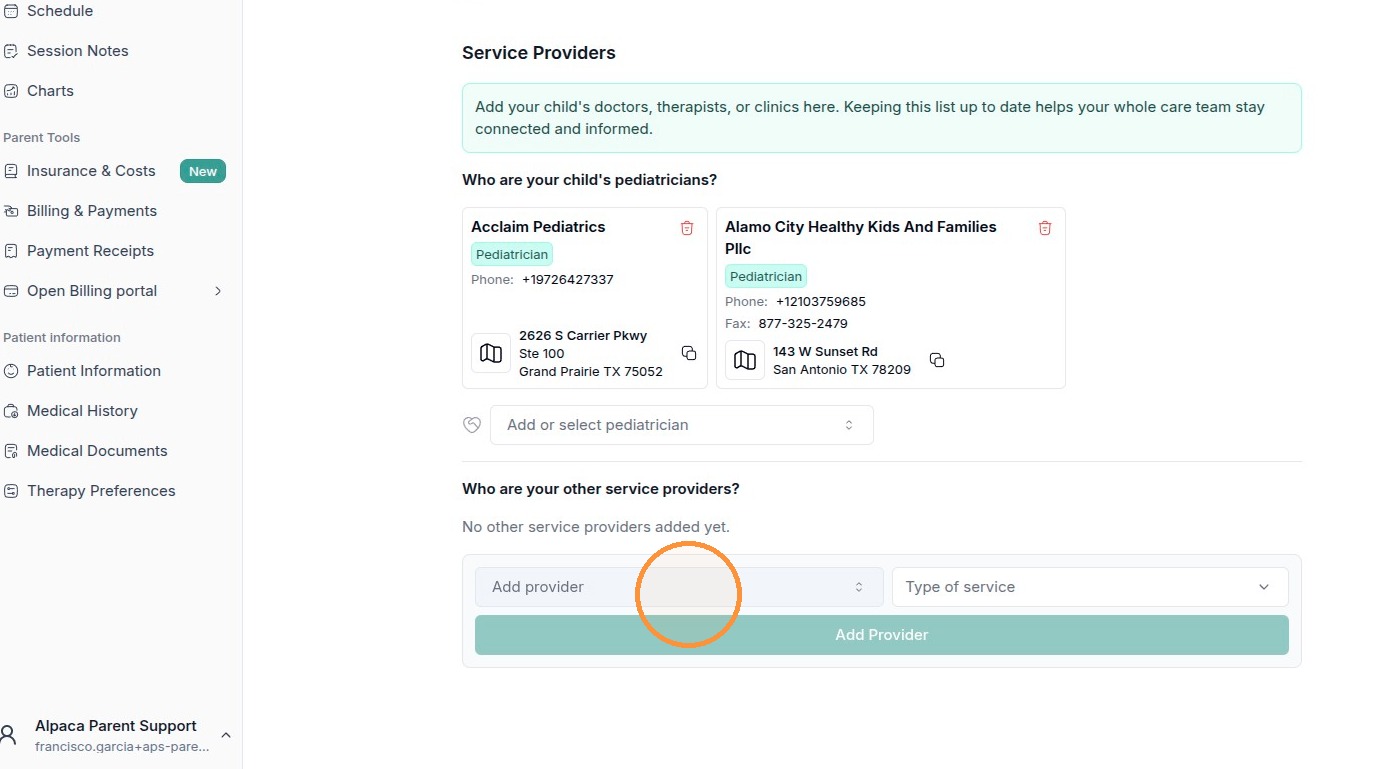
Under “Who are your other service providers?”, click Add provider and choose the provider from the list — or add a new one the same way as above.
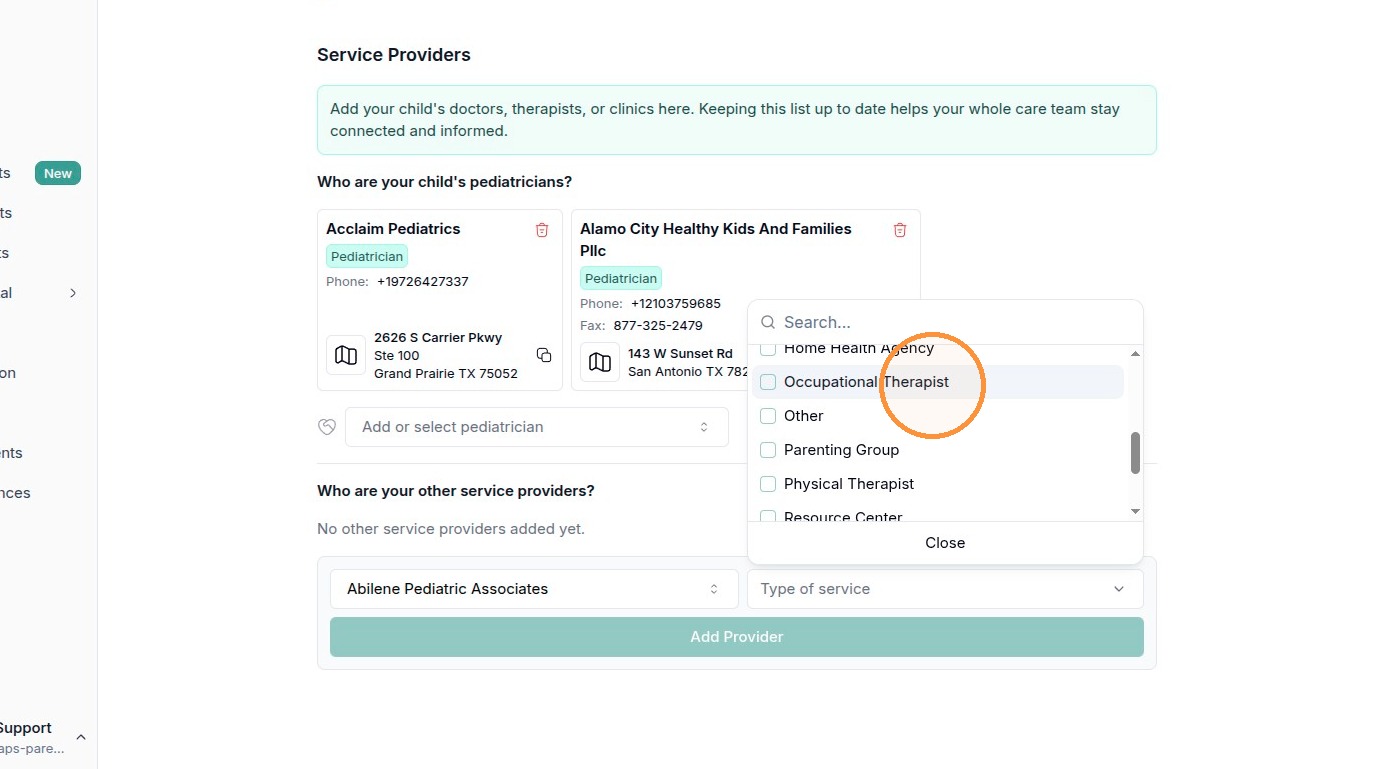
Click Type of service and check what this provider does, for example Occupational Therapist. You can choose more than one. Click Close when you are done.
Click the green Add Provider button to save. It stays grey until you have chosen both a provider and a type of service.
Use the “Add provider” box — not the pediatrician box — for therapists, specialists, and clinics.
Check one or more types of service, such as Occupational Therapist, then click Close.
Once a provider and a type of service are chosen, the green Add Provider button turns on.

What happens next
The count on the Action Required card drops as you complete each task; when the card is empty, you are all set and your care team can keep things moving. If you ever have a question about a specific task, your care team is listed in the Your support team panel on the Overview page.