Get a client authorized from Prior Authorizations
Last updated: October 29, 2026
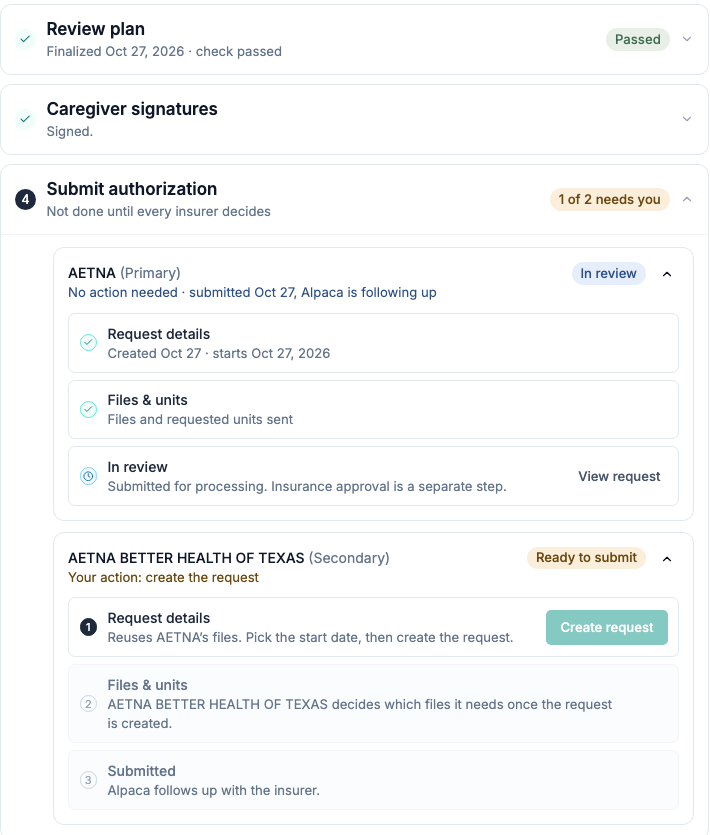
Start in Prior Authorizations, open a plan, and follow it through signatures and submission. Use the pictured steps below as you work.
Demo uses synthetic records. 2 min 14 sec.
New view: In a client’s Treatment Plans tab, select Switch to new view. If that option is missing, use the classic guide. Both views use the same saved plans and requests. Your usual clinical-access, editing, and request permissions apply.
1. Open or start a plan
Select the plan card to continue. For a new plan, select New plan, choose Initial treatment or Reassessment, then Create in Alpaca or Upload a plan. Finish and sign a generated plan before reviewing it.
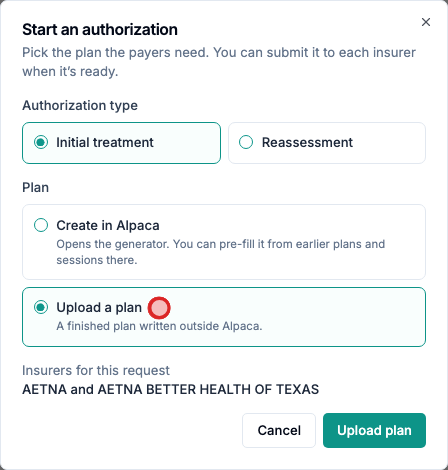
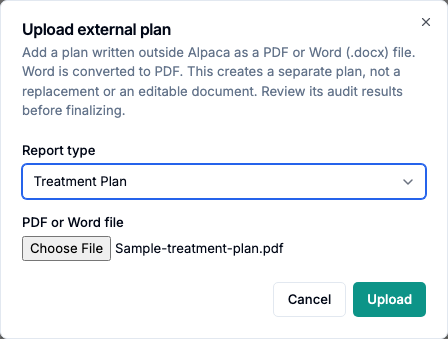
For an upload, choose the report type, attach the finished PDF or Word document, and select Upload.
2. Review the findings
Open Review plan. A ready, unchecked plan starts checking automatically; wait for the results. Address required fixes and review warnings; check off a finding only after resolving it or confirming it does not apply. After correcting the document, use Re-run check when needed.
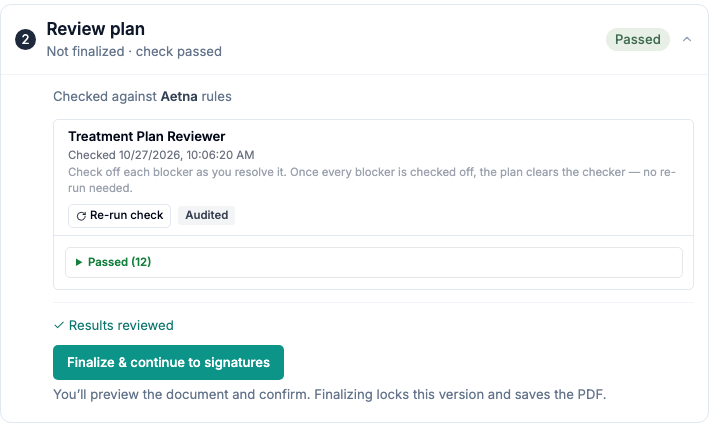
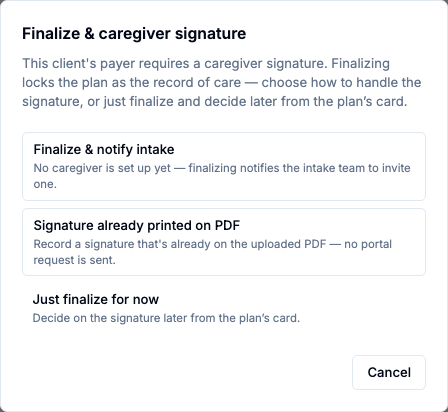
Select I reviewed these results, then Finalize & continue to signatures when available. Review the document before confirming. Uploaded plans may show a signature choice; Just finalize for now lets you finish the signature step next. Generated plans show a PDF preview.
3. Complete the caregiver signature, if required
In Caregiver signatures, select Request signature to send the finalized plan to the caregiver’s parent portal. Continue once they sign. If no caregiver has an active portal account yet, requesting notifies Alpaca’s intake team to set one up; nothing reaches the family until that account exists.
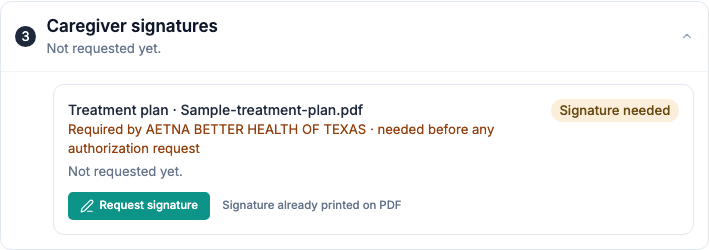
Already signed on the uploaded PDF? Use Signature already printed on PDF only after checking it. Changing the finalized document may require a new signature. A required signature can hold requests across the client’s insurers.
4. Create the insurer’s request
Open Submit authorization, then the intended insurer’s Create request action. Check the insurer, request type, and start date; select Create.
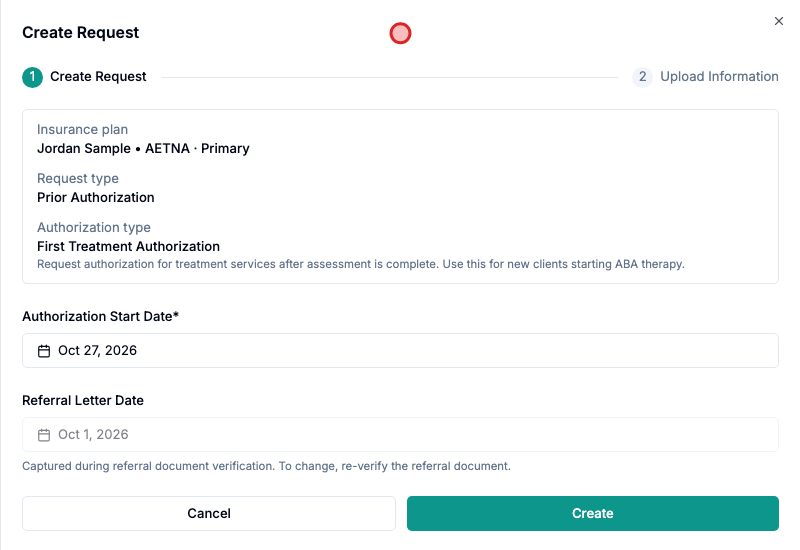
Create saves a request. You still need to complete and submit its packet.
Not sending this plan to one of the client’s insurers? Select Not requesting on that insurer’s row. It drops out of the to-do count and the plan can finish without it. Select Undo to request it again; creating a request for that insurer also undoes it. You can’t mark the last remaining insurer, or one that already has a request in progress.
5. Check files and units, then submit
On Upload Information, review the selected plan and complete the payer’s required documents. Select existing files or upload replacements. Some files need verification before you can finish.
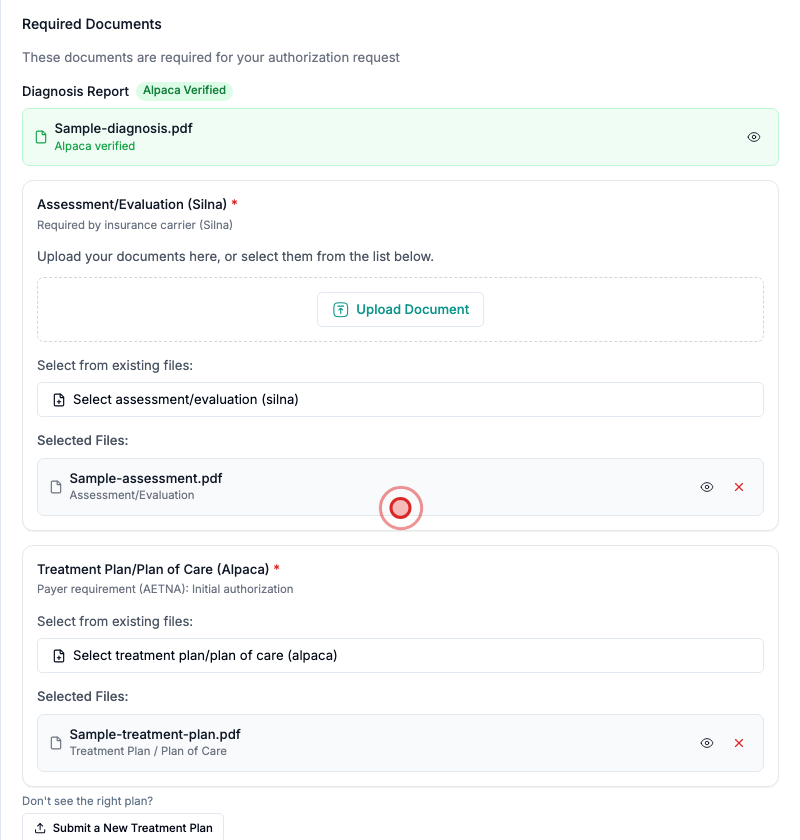
When Service Codes appears, check the codes, hours, frequency, units, and place of service. Use Add or Edit to correct them.
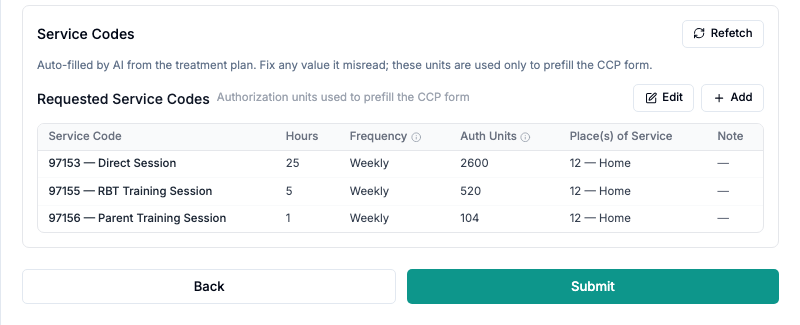
Select the final action shown—Submit, Submit to Alpaca, or Update Authorization—and wait for confirmation.
6. Check the result for each insurer
Return to the plan. Each insurer keeps its own request and status. For another insurer, Send to [insurer] may reuse files; check its dates, documents, and units separately.
What you see | Next step |
|---|---|
File uploads needed | Select Attach files to finish the existing request. |
Waiting on caregiver | Check the signature step; prepare other available files while waiting. |
In review | Alpaca or the insurer is processing the request. |
Review approval | Open the partial approval and inspect what was approved. |
Not requesting | You chose not to send this plan to that insurer. Select Undo to request it again. |
Submitted does not mean approved. Check Care Readiness for the client’s overall readiness to start or continue care.
Payer-specific steps
Review BCBS form: Review and approve the BCBS Texas form before submitting.
Awaiting Physician: Alpaca is obtaining the signed CCP. The request submits automatically afterward; don’t create a duplicate.
For document changes and downloads, use Plan & documents. Read how edits affect signatures. If a request fails, follow its missing-information message and resume that request. For access or setup problems, contact your clinic administrator or support@alpacahealth.io.